Lighting Basics First
In the days of cellulose film-oriented photography books, most authors recommended the photography lighting basics of three and four light setups. These lighting setups usually included a main or key, fill, back and background light for studio photographers. These same authors would often share their lighting ratios too, usually targeted at high-key or low-key lighting, from a 1:1 to an 8:1 ratio variation depending on the photographer’s style.

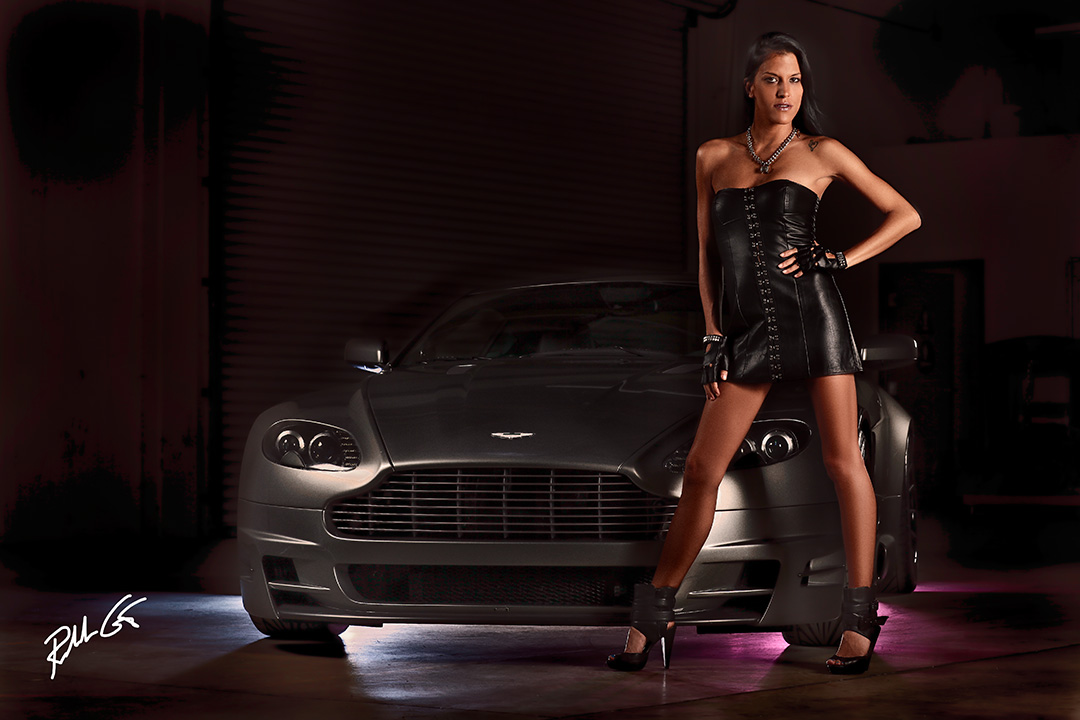
Here we start with a four point lightning setup then added lights under the car to add impact to the image.
In these same books, the author would normally include captions with camera settings, lens information, lighting equipment used, specific lighting ratios, specific lighting angles in degrees and the distance of the light source to the subject. So once, I asked a very prominent photographer and author of one of those “from back then” photography books, “How did you remember all those specifications when you wrote your books?”
His response, “Are you kidding, I never wrote them down when shooting and I certainly don’t carry a compass nor a tape-measure, and I’m not into calculating ratios, though I’m sure I used a light meter—basically like most photography book authors, I just guessed when it came to photo captions.”
I was shocked, because as an author of photography books myself, all my camera and lens settings mentioned in my captions are exact. It helps that with digital photography the data is found in the metadata file of the original image. Obviously, something not found on film-produced photos. On the other hand, I’m not a ratio calculating photographer, I light my subject/scene, based on my photographic style. LCD previews after the shot helps and mirrorless cameras make it easier in ambient light with a what you see is what you get preview in the electronic viewfinder.

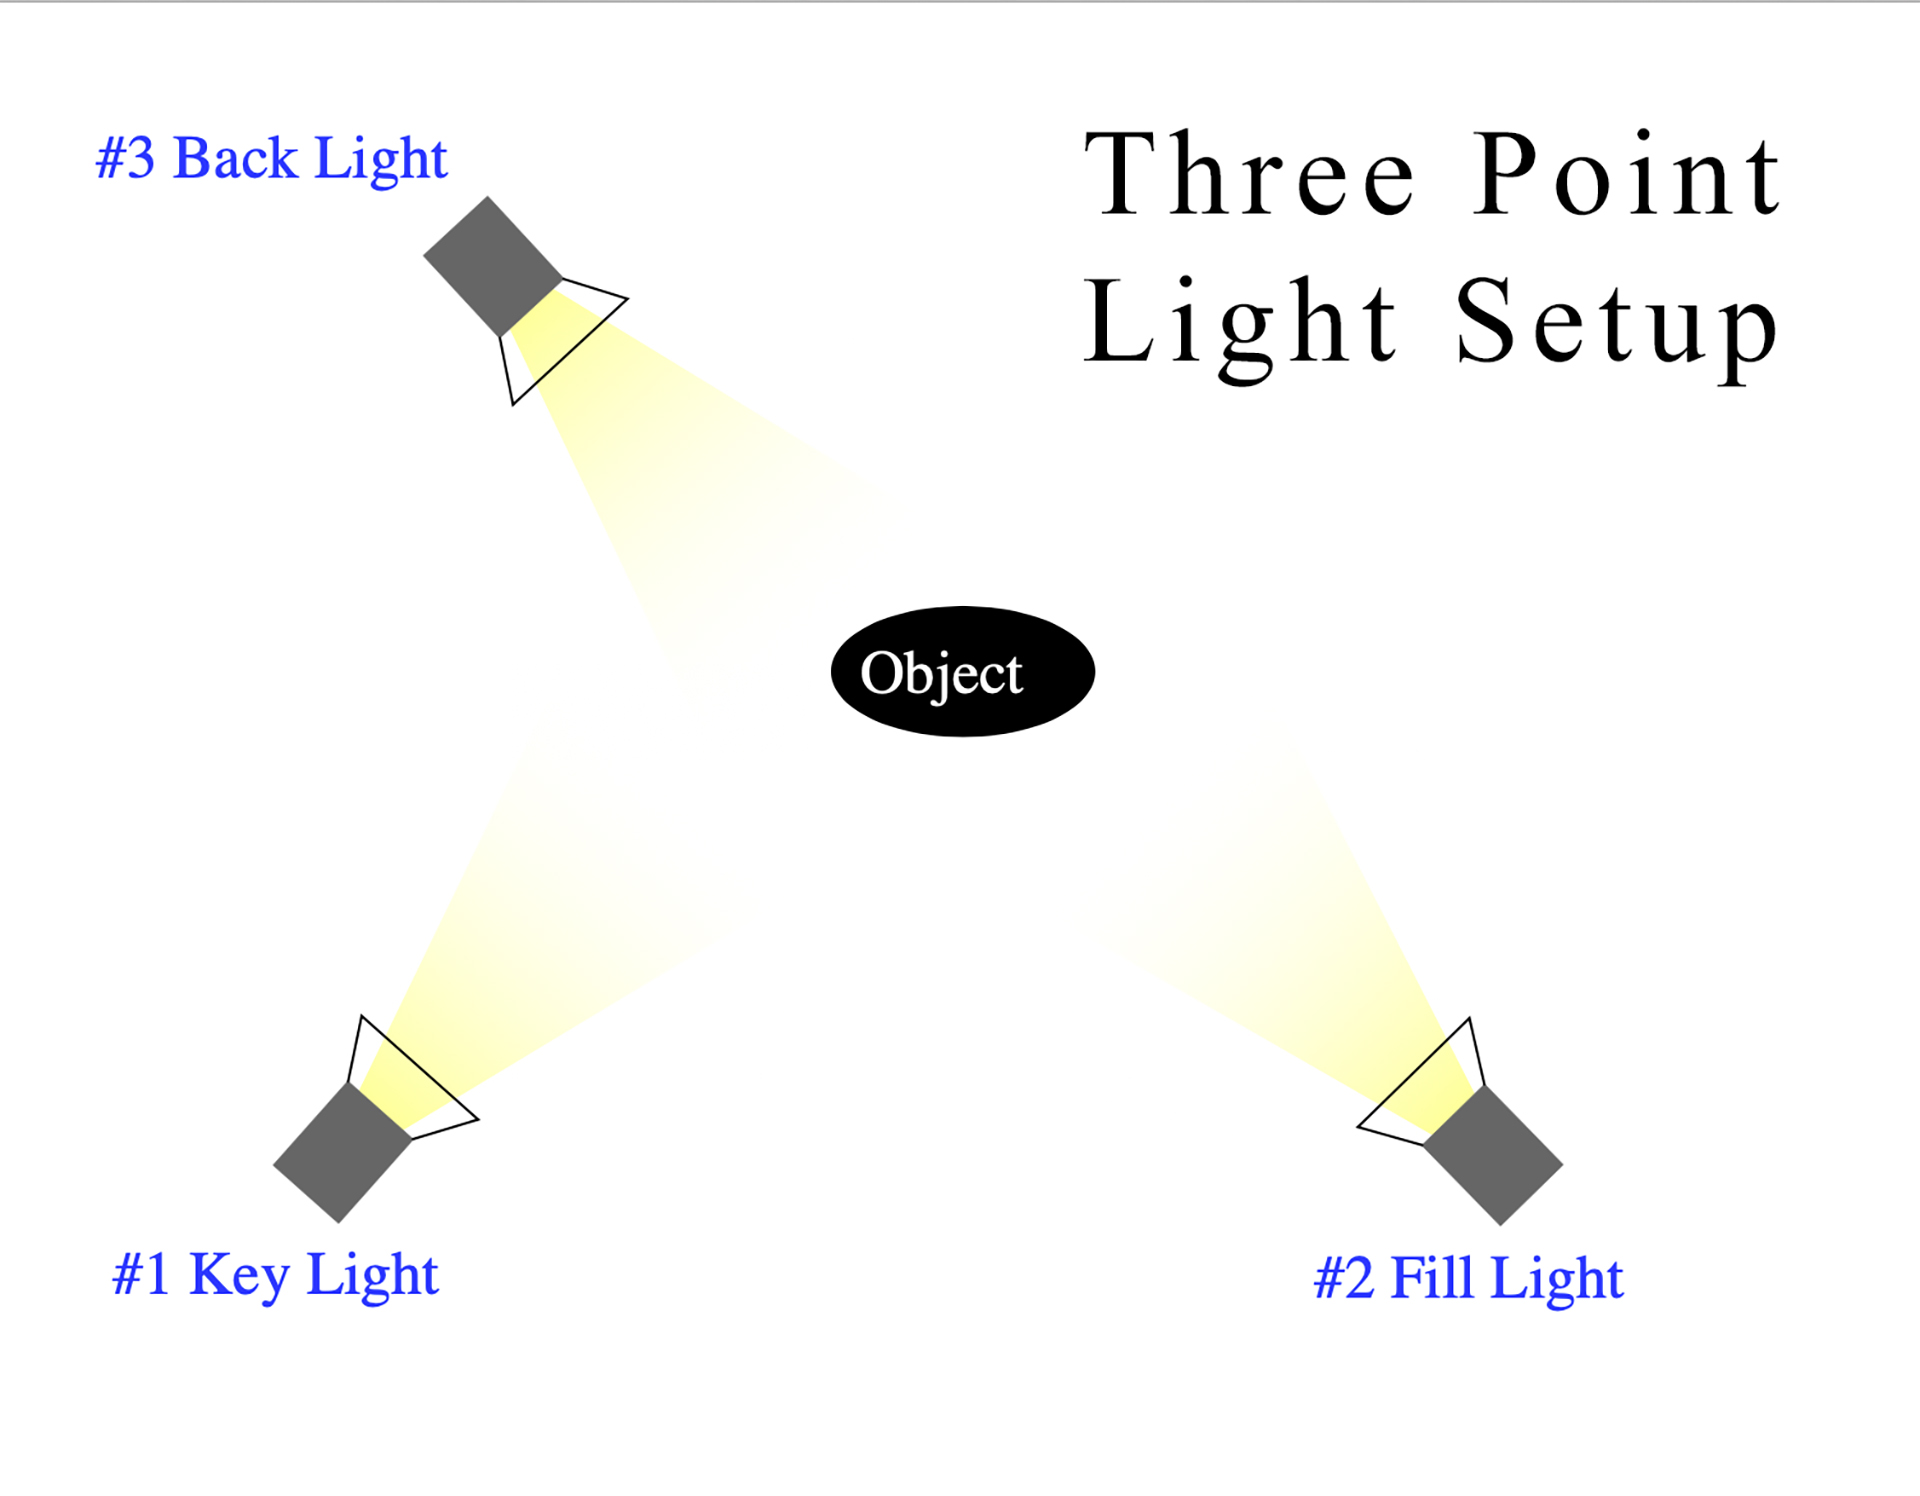
Here you have a simple three point lighting diagram you can start with, then adjust light placement for your photography style.
Sure, in the film days, I broke out the light meter at times but today, with digital camera LCD screens and electronic viewfinders a photographer can adjust their lights with instant verification of the image and a review of the histogram for on-the-spot corrections. Fancy talk aside, let’s get down to what matters—photography lighting basics of three and four light setups.
Main or Key Light
First, let’s start with the main lightas the other lights are adjusted to its actual output. The first thing to consider with your main light is make sure your fill light is not set to the same output intensity that strikes your subject otherwise you’ll get two shadows, one on each side of the nose. A professional photographer normally only creates one shadow on one side of the nose. When the fill light is set almost equally to the main light in power output, you wind up with two shadows on each side of the nose—the sign of an amateur photographer.
It’s the intensity of the fill light that determines the softness or hardness of that main nose shadow. While some photographers prefer no shadows on the nose—especially in beauty photography or high-key photos, most photographers understand shadows are good because they create the illusion of depth in the form of a more three-dimensional image. An image comes to life with the illusion of another dimension, so don’t be afraid of shadows.

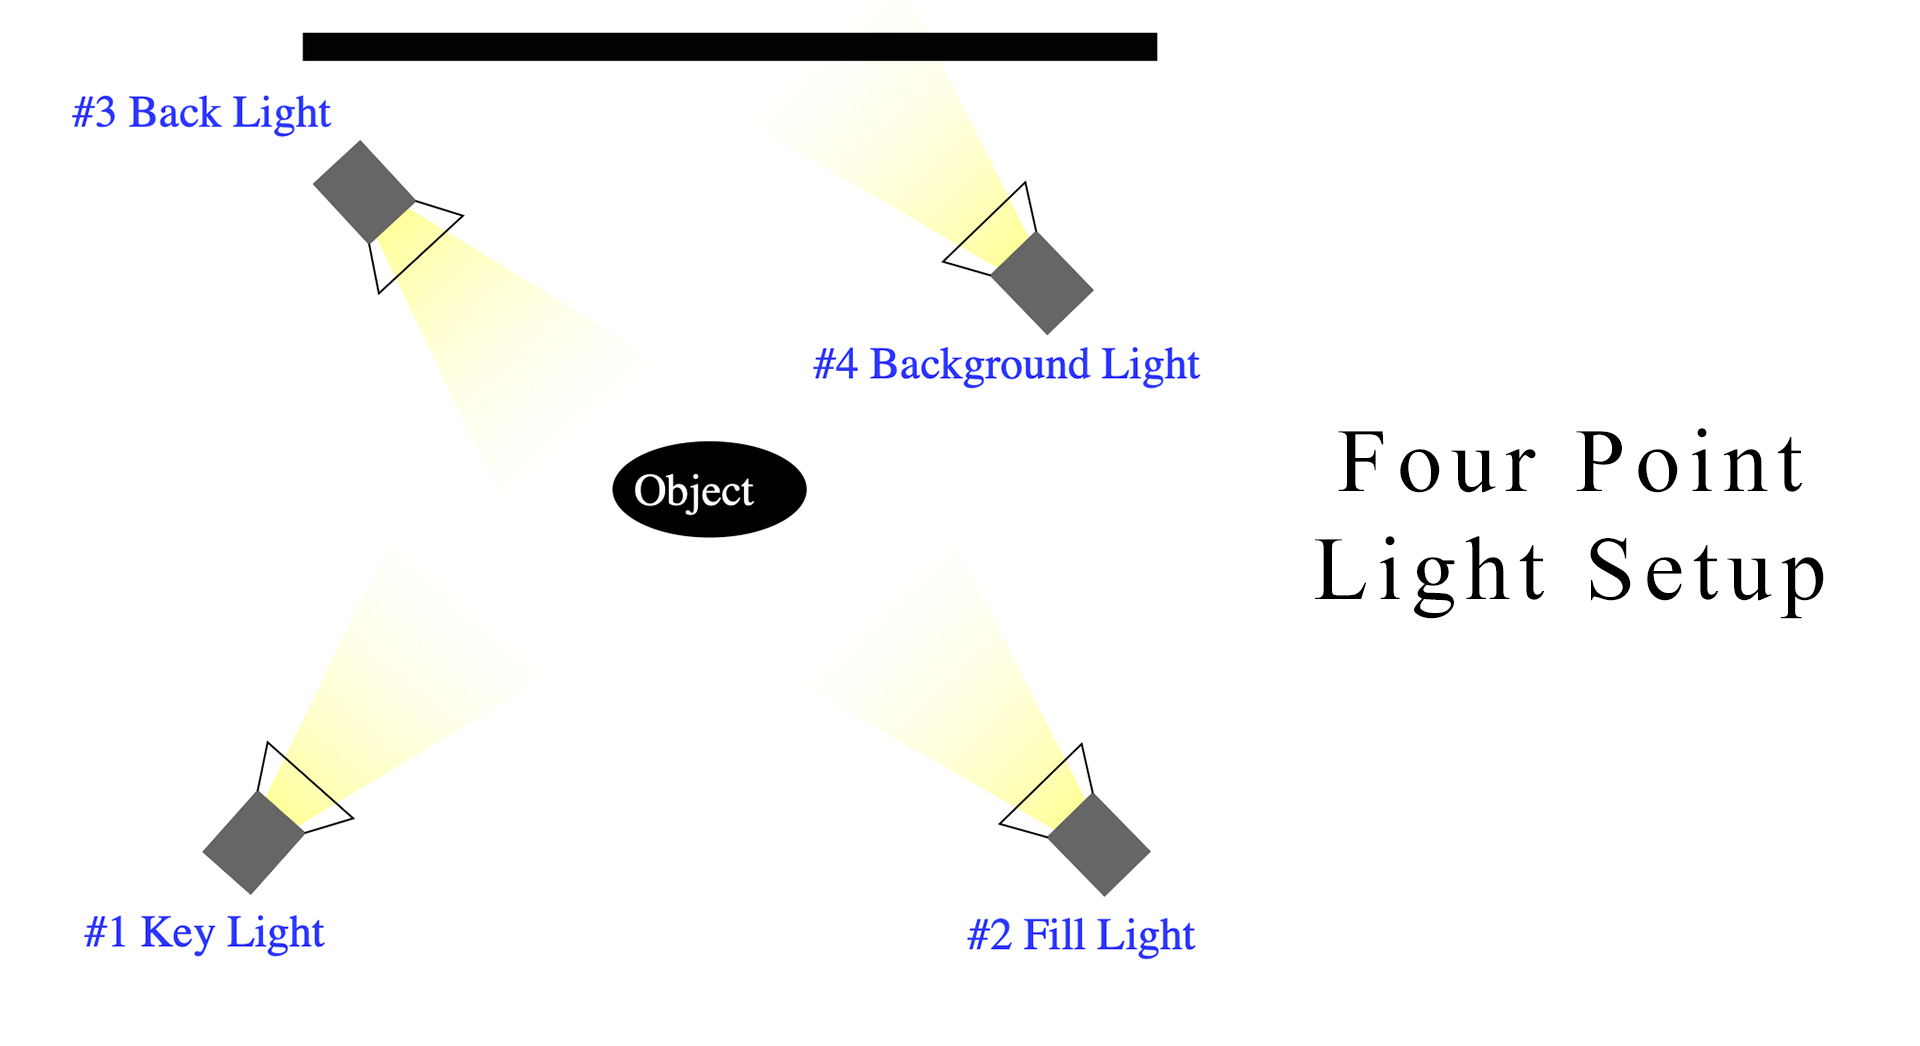
Here you have a simple four point lighting diagram you can start with, then adjust light placement for your photography style.
Fill Light
As discussed before, fill light never overpowers the main light and it normally has a similar light modifier like the main light. Similar doesn’t always mean the same size and shape light modifier, but a light modifier just as soft or softer in light quality than the main light. This touch of softness comes from less intensity than the main light and the movement of the fill light closer to the subject than the main light.
However, the fill light isn’t just for soft nose shadows or other shadows, it’s there to illuminate the other side of the subject because usually the main light provides light from one angle and the fill light comes from the opposite angle. The actual adjustment of light intensity from the fill light relies on the photographer’s chosen style.

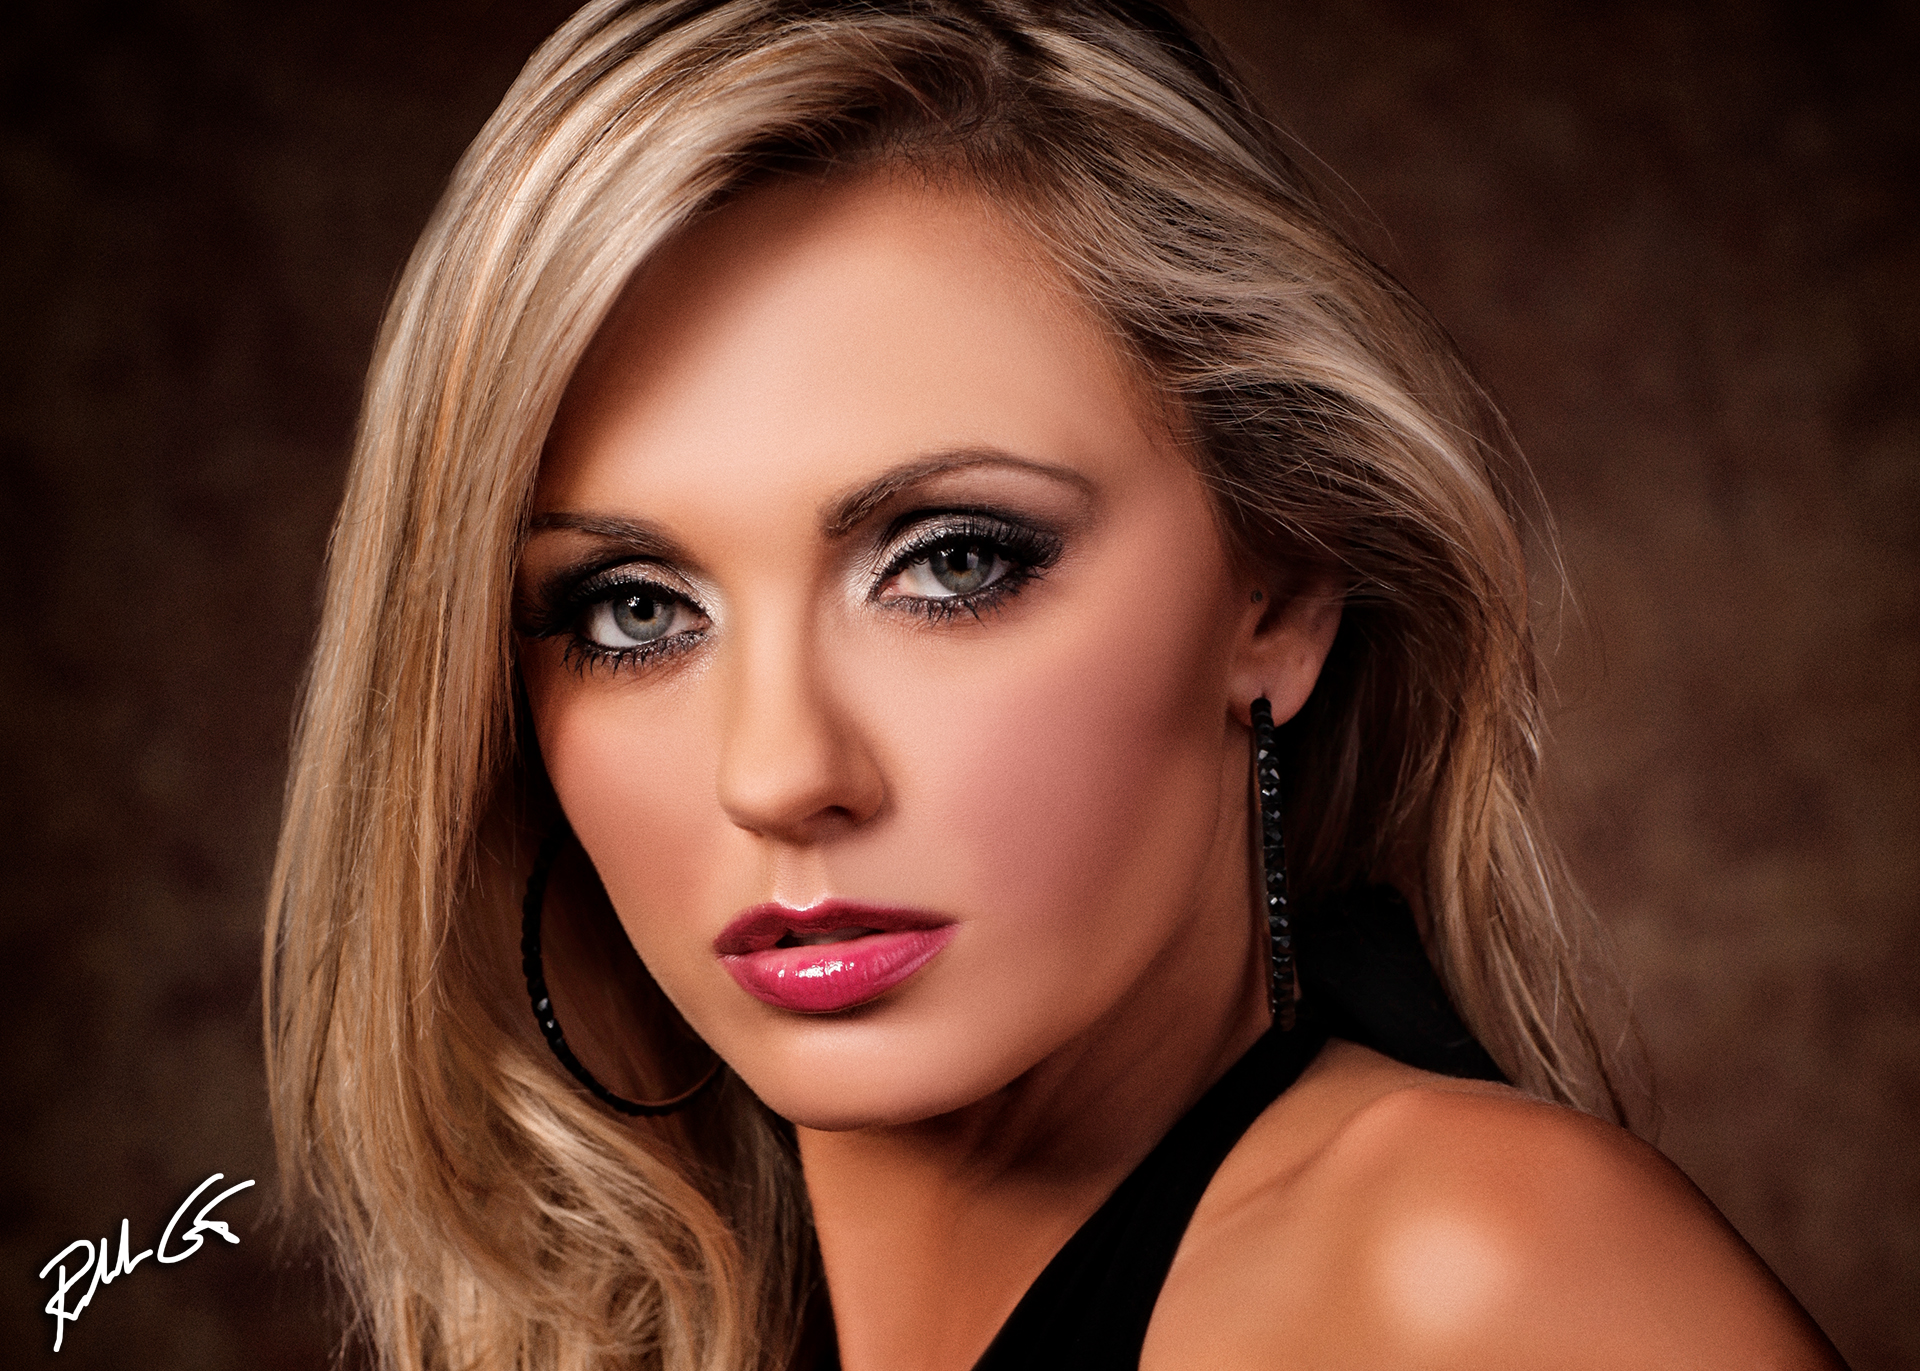
In photography lighting basics of three and four light setups, this photo illustrates three point lighting.
Back Light
Now we move on to the back light, often referred to as a hair, rim, edge, accent or shoulder light when it comes to portraits. Again, this is a light adjusted to the photographer’s photographic style. Normally you place this light behind the subject, slightly off to one side and out of camera frame, then adjust it to outline the body contours or to accent the hair more broadly. This light usually requires a smaller light modifier to focus the light where needed. A 7-inch metal reflector attached to the light with a 10-, 20-, 30- or 40-degree grid placed directly in front of the reflector works great. Some photographers will often slightly warm this light with gels too.
The intensity of any back light should not overexpose the subject where the light strikes. When back lights strike the front of the subject, it’s called spill light. While spill light can add some interesting effects, most professional photographers avoid spill light by using flags, cutters, or V-flats—black foam core boards taped together that form a V. The main idea behind a back light is to separate the subject from the background, especially when your subject has dark hair against a dark background.
Background Lights
The final light is the background light primarily used to illuminate the background for some type of effect. As an example, in high-key lighting many photographers will use one or two background lights to ensure their white seamless background paper stays white.
Background lights are also used for the illumination of background elements, such as props in the scene itself. They also eliminate shadows caused by the subject or foreground props too. Think of the latter scenario as a background light used like a fill light for the actual background itself. Background lights also add some depth to create another three-dimensional illusion of the final photograph.
Now that is the photography lighting basics of three and four light setups without tape measures and compasses and as you become more experienced in photography, you’ll learn to rely on that experience to build consistency in all your photo shoots. Consistency leads to the development of your photographic style too, something professional photographers possessed back in the old cellulose film days of photography and digital photographers should strive for too. In the end, it’s about bringing your photos to life when it comes to photography lighting basics of three and four light setups with consistency.


Thank you so much for sharing your knowledge with us. I never went to media school but, because I’m a passionate actor, I want to learn and understand the whole process, hence my curiosity for photography and videography. In fact, my new job description [in a corporate] includes photography, videography and video editing. I’m practically learning along the way, on-the-go and these tips are just the ones I’m looking for. I’m 51 y.o. and with new-found passion it feels like I’m back to 20… Thank you.
You’re welcome. We hope you find many things that will be helpful here at SunbouncePro.