When we point our cameras into the deep-blue sky to take a photograph, do we always get the color and hues we see? Most of the time yes, but if the sky is gray-dull, or you’re in a creative mood, you can change the sky into any color you’d like. You can even control the saturation of that color too simply when you apply modified film techniques right in your digital camera.
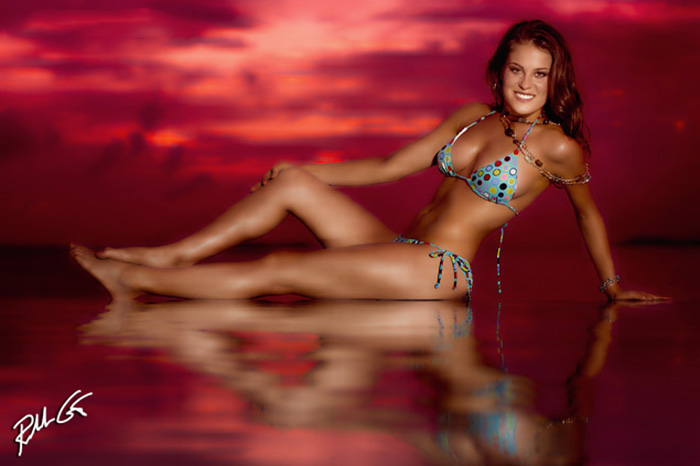
In this photo of American Idol star Amy Davis, I used a cyan gel to turn the sky red in the camera with a custom white balance. The duration of the flash is Amy’s shutter speed. Thus, this allows you to change the shutter speed to darken or lighten the sky’s saturation of color.
In the days of film, professional photographers relied on glass filters like an 80A (blue) filter over their lenses when they were using daylight-balanced film and working with tungsten lights. The warm light created by the tungsten light source would fall on the subject, and the blue 80A filter would cancel out the warmth but the sky would go bluer because there is no light or flash on earth that can brighten the entire sky.
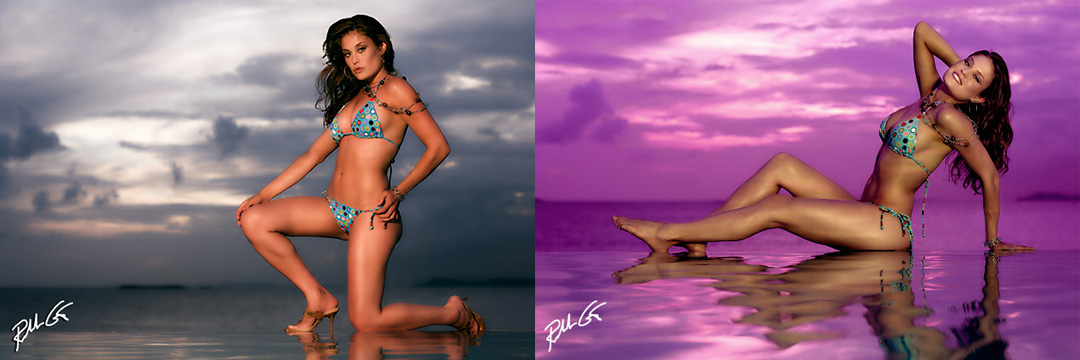
In these photos of American Idol star, Amy Davis, in the left photo, no gel was placed on the flash, thus a normal sky. The photo on the right, a green gel was placed over the flash with a custom white balance on the camera to create the magenta sky directly in the digital camera.
This balancing of colors worked great for the illuminated subject, but any background or foreground not illuminated by the tungsten light source would become blue. This made for a great, saturated, blue sky or background. However, it also meant that you had to compose the image with a dense, dark blue filter on your lens, making the objects in front of the lens harder to see and the focus more difficult to achieve. With digital, you can simply set your white balance to 3200K, or tungsten, to mimic the effect of tungsten film in your digital camera. On some cameras, you can use the incandescent light white balance setting.
Though we’ve eliminated the use of an 80A filter, you still have to light your subject with tungsten light, or a use a technique like a 3/4 CTO gel over your flash. This technique produces a dramatic blue sky, but not everyone likes to carry hot lights on location. Tungsten light kits are often bulky and they require at least 1000 watts of power. Also, the light emitted is physically hot and can melt the subject’s makeup and because they are bright, they can make the model squint. Finally, a tungsten bulb is a very specular light source, and the hard light it produces is never flattering to a model’s complexion.
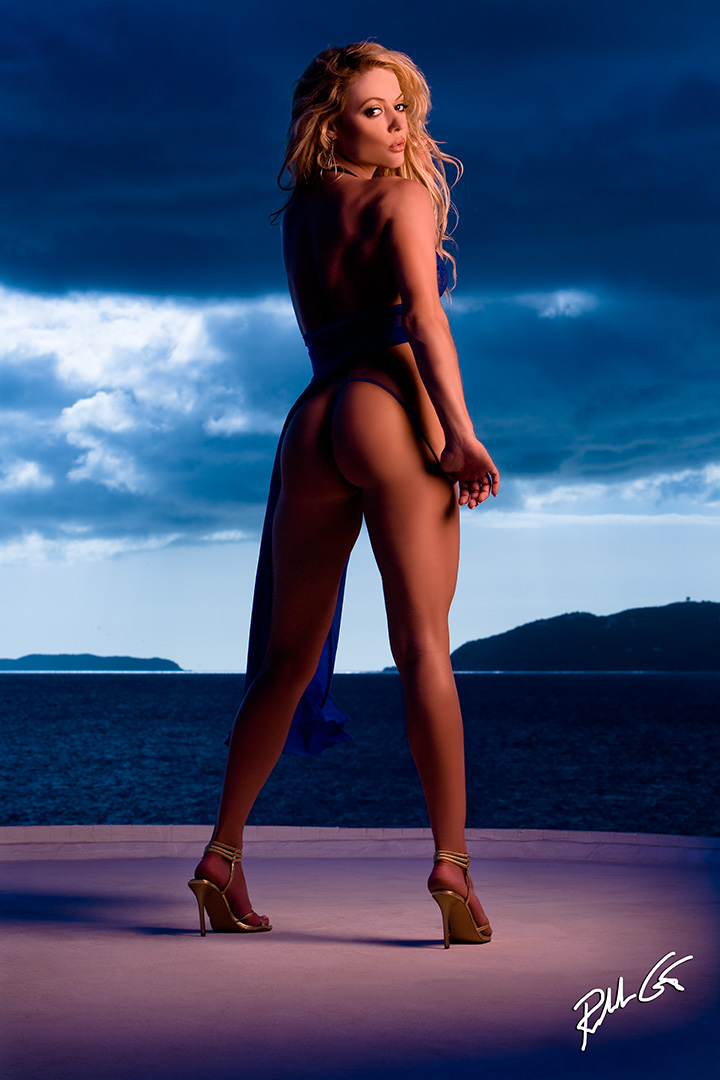
Tess was photographed with a 3/4 CTO places over the flash and the digital camera’s white balance is set to 3400K or tungsten.
Like most photographers, I don’t want to carry more photographic equipment than I have to when I am shooting on location. The solution is simple—place a Rosco 3/4 CTO gel over the studio flash or camera flash itself. I’d recommend a portable studio flash unit with a 22-inch beauty dish or a medium soft box attached as the final light modifier. The larger the light source, the sweeter the light that will illuminate your subject.
CTOs are commonly used by Hollywood photographers and cinema photographers to create warmth, especially when applying edge, rim, or accent lighting while creating dramatically lit photographs. Rosco CTOs come in various fractional strengths, from 1/8 to a whole (also called a “full”) CTO. My personal favorites for edge, hair, accent, and rim lighting are the Rosco 1/8 and 1/4 CTOs, but to capture the sky with a nice, deep blue, you need at least a Rosco ¾ CTO, or Rosco #3411 gel. This gel costs around $7.00 for a standard full sheet and also comes in more expensive rolls. You can order them online or purchase them at your local photo store or theatrical supply house. The Rosco 3/4 CTO is designed to convert the color temperature of any 5500K light source into a 3200K (tungsten) color temperature light source.
Simply tape the gel over the flashtube, but not the modeling lamp, then attach your soft box or tape the full gel sheet over your beauty dish—it fits perfectly. Chimera makes a 3/4 CTO diffusion panel that replaces the standard white diffusion panel for their soft boxes. Sometimes I prefer using the CTO panel than to place a gel over the flashtube, as it allows me turn on the modeling lamp on the flash head without the heat of the tungsten modeling bulb melting the gel.
Now that the color temperature of the flash is changed to tungsten, you have to set your white balance to match and whatever area the flash doesn’t reach, it will turn some shade of blue, depending on the amount of ambient light. For example, if you place a model outside under open shade, then place a Rosco 3/4 CTO on your flash and set your white balance to 3200K and depress the shutter button, the flash will fire and illuminate your subject. Your subject will look as she should when illuminated by a tungsten source, but the background and sometimes the foreground will turn blue if it’s illuminated with daylight or a daylight-balanced light source.
Because I prefer to shoot warmer tones when photographing models, I often “bump up” the warmth by setting my camera between 3700 and 4000K with the amount of the adjustment dependent on the model’s skin tone instead of the normal 3200K. With this technique, my camera doesn’t know if I’m using flash or a flash covered with a gel, it only knows what I tell it from the settings I program. In this case, I’m using the 3700–4000K setting to trick the camera into thinking the light source is slightly cooler than tungsten. Therefore, the camera will add more warmth than if the white balance was set to 3200K.
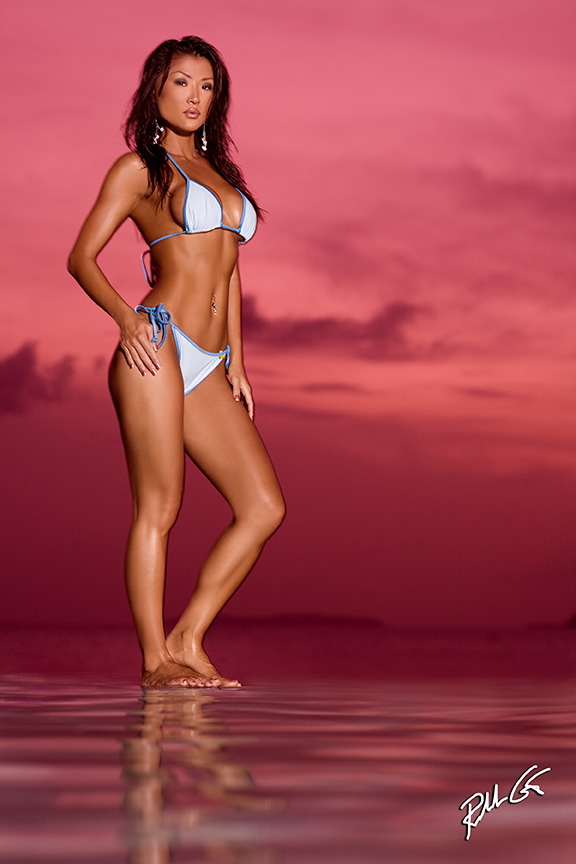
The flash used to illuminate Tilae is covered with a cyan gel, then the camera is custom white balanced to match, thus the sky turns red, the opposite color of cyan.
Now let’s suppose you want to make the sky red, not blue. You’d simply tape a Rosco cyan gel over your flash, then have your subject hold a white 100 IRE card (some camera manufacturers prefer an 18 percent gray card) and photograph the card with the cyan-gelled flash. (Note: If you don’t have a 100 IRE white card available, a white t-shirt or white towel will work.) The key here is to fill the entire frame with the white card or white object, store the image in the camera, and select it as your white balance image—a custom white balance. Most cameras have their own proprietary method for setting a custom white balance, so please refer to your camera manual.
When you photograph your subject with cyan-gelled flash and use the custom white balance you’ve set, the subject is illuminated with cyan light, but the camera adds red to ensure a known white will remain white with that light source. In this case, then, the background will turn red and the subject will be rendered with a normal skin tone.
Please keep in mind, the custom white balance method over the manual white balance method is not always an exact science. With the Rosco 3/4 CTO over a flash unit, you can easily select the exact number (3200–4000K) as the Rosco 3/4 CTO is an exact science when used in conjunction with on-camera or studio flash (5000–6000K). Unfortunately, with the more complex gels of cyan, magenta, red, etc., you must do a custom, not manual, white balance, and while most cameras can handle this well, some only come close. When using these colored gels, it’s best to capture your images in the RAW or the highest quality JPG mode. In the RAW mode, using the camera’s conversion software or an image-editing software like Adobe Lightroom, you can tweak the white balance for better accuracy in establishing a natural skin tone on your subject.
This technique of using gels with flash units was used in the old film days too—however, you’d have to shoot through an exact opposite gel or filter and were limited to those exact opposite colors. With digital, we have a larger range of color options because we’re using custom white balance through the camera’s proprietary software, thus it’s more accurate without shooting through a plastic gel or colored filter. One of my favorite effects is placing a green gel in front of the flash so that the sky becomes magenta. All this is done in the camera, not in postproduction. You’ll see it right there on your digital camera’s LCD preview screen.
Some photographers will claim that when shooting in the RAW mode you can white balance during the RAW conversion and avoid having to do a custom white balance during the shoot. I don’t recommend this, as you’ll get a more accurate and correct skin tone with the correct white balance setting during the shoot, especially when working with strange colors and not the standard red, green, blue, and their exact opposites, cyan, magenta, and yellow. I might add, if you don’t do the custom white balance when using colored gels on your flash, your subject will look extremely off-color in the LCD screen, and when your subject wants to view the images during the shoot, they will think you’ve made a serious lighting mistake. Always do all you can in the camera during the shoot and you’ll love yourself for it during postproduction—it saves heartache, heartburn, and time by shaving hours off postproduction.
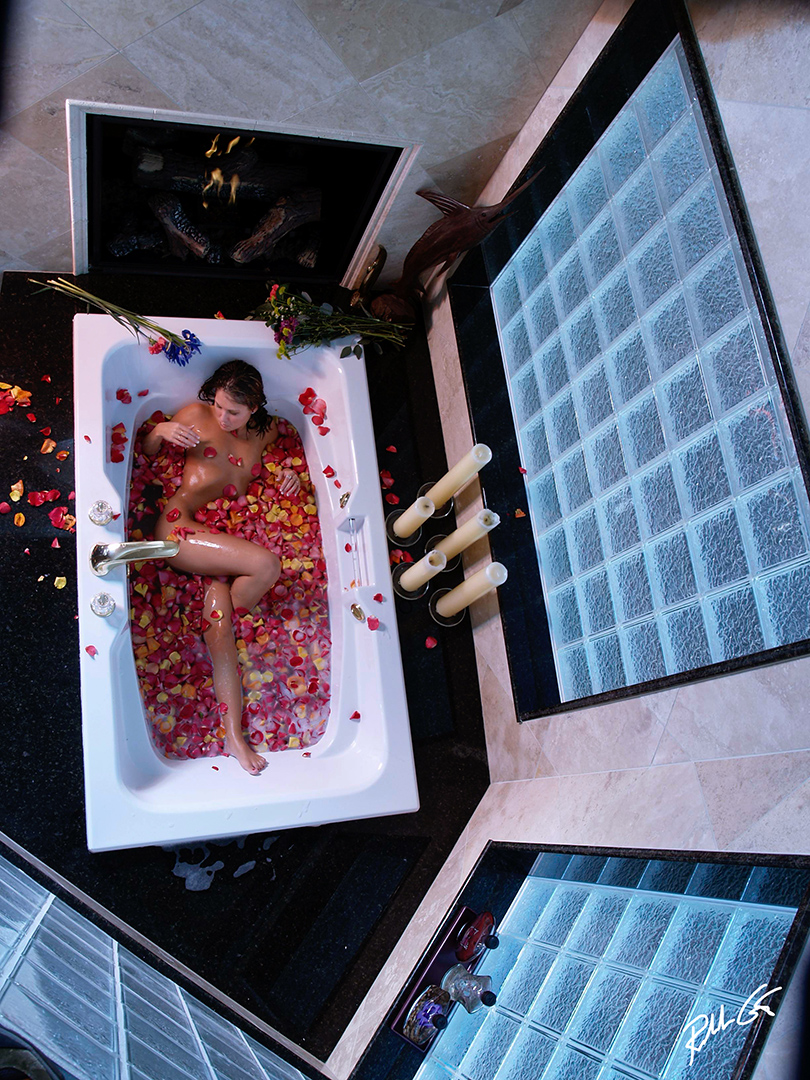
Nikki was illuminated with a 22-inch beauty dish covered with a 3/4 CTO gel that converts the studio flash from 5400K to 3200K, or flash to tungsten. Natural outdoor sunlight comes through the glass blocks and since the digital camera’s white balance is set to 3700K, the daylight turns blueish.
While these techniques are great for outdoors, don’t limit yourself as you can apply this technique indoors too. As an example, if you photograph a model in the studio on a white seamless or a white cyclorama wall with the main light covered with a Rosco 3/4 CTO, you simply set the white balance on your digital camera to 3200K or a slightly higher number, then aim two regular flash units without CTO’s or gels into the background. Now your background should take on a bluish appearance as it is reflecting “daylight-balanced” flash back into the camera at approximately 5400K and your digital camera is set to a more tungsten white balance of 3200K–4000K. You can do this also with other colored gels using the custom white balance technique previously explained for cyan or green gels to create red or magenta backgrounds.
When working at a residence or building with windows that allow daylight to filter in, you’ll get the same blue-tinted effect on any light coming through any windows or glass block provided you use a Rosco 3/4 CTO gel on your main light while white balancing to tungsten. Hollywood photographers often use this technique to create “blue moonlight” or a nighttime effect to come through windows or glass during the daytime.
You can do just the opposite by white balancing to daylight and using tungsten light sources as accent, rim, hair, or edge lighting and using regular flash without any gels as your main light. As an example, most studio lights have tungsten “modeling” lamps. These are the lights that continuously on when your studio or portable studio strobes are turned on. By simply placing a 7-inch reflector on your monolight with a 20- or 30-degree grid behind your subject and aiming it at their back or hair, you’ll get a beautiful golden glow created from the white balance mismatch of daylight and tungsten.
The key here is to drag your shutter so the camera will pick up the less intense tungsten light from the modeling bulb. Make sure to turn off the flashtube on your studio monolights used as accent lights only, in order to do this. Don’t worry if your shutter speed is 1/30 or 1/10 second, as the real shutter speed for your subject is the duration of the flash from your main light, so your subject will be tack-sharp when the shutter button is depressed. Most great flash units like the Hensel, Dynalite, Profoto, or Broncolor have short flash durations, thus it gives you a great shutter speed to capture your subject.
Another place to utilize this technique is when you photograph a model while in a master bath area of their home. Most of these rooms have glass block windows that allow ambient light to filter in, and by placing a Rosco 3/4 CTO on your light modifier, like a beauty dish that will illuminate your subject and set your digital camera’s white balance to 3200K to 4000K, and all ambient light from the glass blocks will turn blue. You might get some “spill” ambient light that will add a tint of blue in the white tub, foaming bubbles, and the water that contrasts with the warmer tones of the model’s skin. The end result is an image with great contrasting colors, not just plain flash or clear white light.




Trackbacks/Pingbacks