Aspiring Photographers Learn from the Masters
Some of the greatest photographers in the world made their mark by simply studying the styles, ideas and techniques of other artists, whether it was their mentor photographer or one of their favorite painters. Ultimately, they all shared a common goal, to attain the ability to create better quality photographs as they progressed in their careers while refining their style.

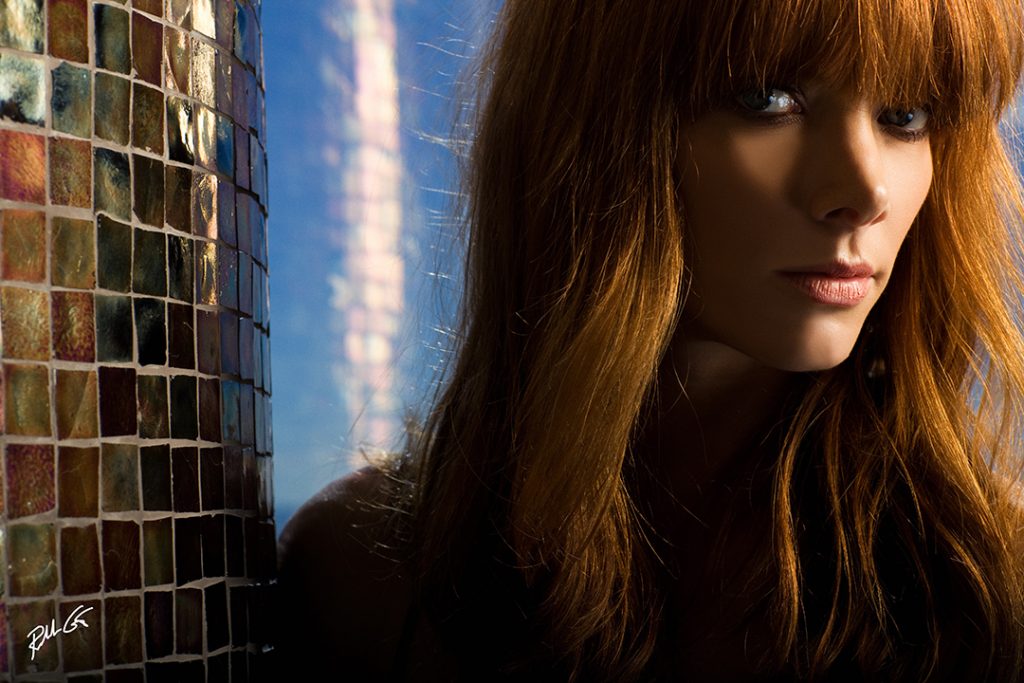
Rembrandt lighting brings a one-dimensional image to life with the use of chiaroscuro as in this photo of agency model Jenni. Simply have your model turn her face toward the camera and away from the light until you see the Rembrandt triangle of light.
This might explain why most photography instructors and some of the top photography schools, love to teach their students four fundamental concepts, Paramount, Split, Loop, and Rembrandt lighting. The latter type of photographic lighting is named after Rembrandt Harmenszoon Van Rijn, the great Dutch painter himself.
The Rembrandt form of lighting in photography is my favorite that many photographers incorporate into their style of photography, simply because of how it assimilates itself to chiaroscuro. Chiaroscuro is one technique that helps artists, photographers or painters, bring life and realism to their one-dimensional mediums, the canvas or photo, by utilizing lights and darks to create an illusion of a third dimension. In the case of photographers, it’s all about the lighting and don’t fool yourself, Rembrandt lighting isn’t specifically tied to artificial lighting, such as a studio flash. It’s easily created with natural, ambient or existing light too, and it’s actually created by how you place your subject into the light, not the light into the subject.

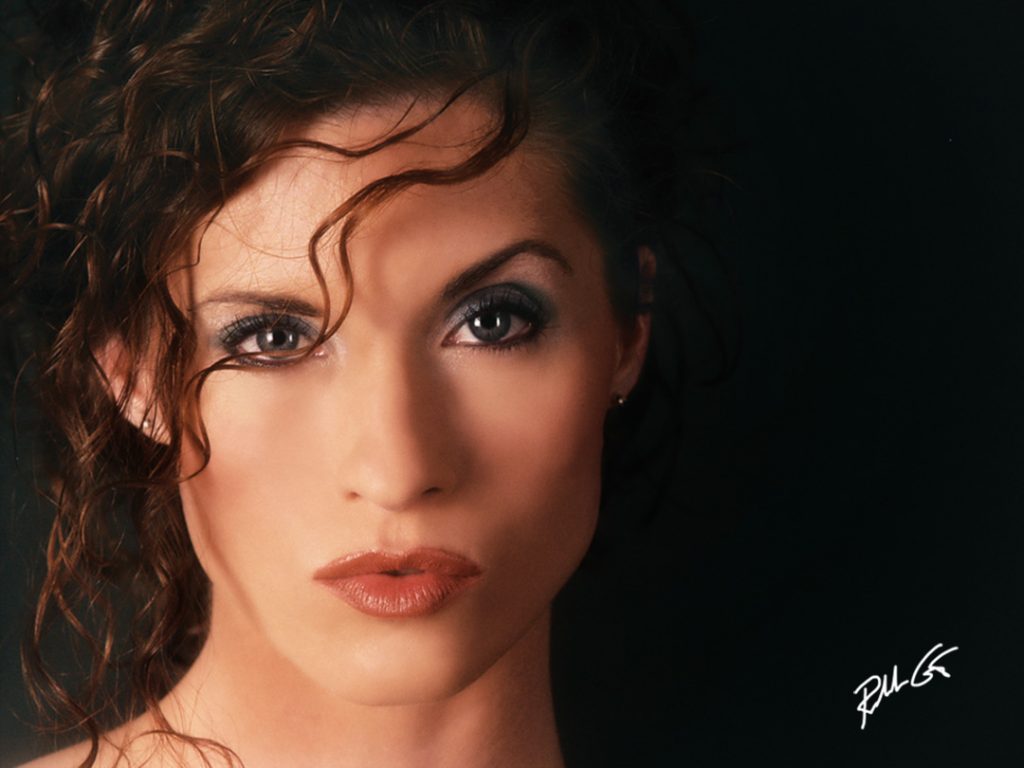
Rembrandt lighting is flattering to your subject and helps define her facial structure as in this photo of Candice in a subtle manner.
That placement of the subject into the light, or for example, having your subject turn their head away or into the light, is key to Rembrandt lighting in order to create the triangle shape of light underneath the eye. Usually that geometric shape of light is found on the eye furthest from the camera lens, but that is not a must in order to utilize Rembrandt lighting. Success with Rembrandt lighting is geared more on ensuring that one side of the face is illuminated well from the main light source while the other side of the face sports a nose shadow, then a triangle of light underneath the eye, as the light fades to shadow on the side of the cheek.
Like triangles in posing, triangles in lighting are effective too, but certain geometric rules apply for effective Rembrandt lighting in photography. One, the base of the triangle, which is located directly underneath the eye, should not exceed the width of the eye and the height of the triangle, should not exceed the length of the nose as it comes down. While we’re not going to break out protractors and force you do some mathematical equations, I will tell you in this type of triangle, produced by light and shadows, there is no hypotenuse as we’re not necessarily after a right triangle. The goal here is more of an acute triangle where any two sides of the triangle never form more than a 90-degree angle and no two sides form less than a zero-degree angle.

Simply turn your model into or away from the light until you see the triangle of light under one eye for Rembrandt lighting.
Basically, I’m trying to paint you a picture of what makes ideal Rembrandt lighting and I’m not trying to torture you into learning the history of mathematics, that alone starts back thousands of years before Christ whereas Rembrandt, a master at using chiaroscuro, dates back as far back as the mid-1600’s, hence why this style of lighting is named in his honor as it’s closer to the birth of the first permanent photograph in the early 1800’s.
What’s important here is not how harsh or soft the shadows are, or the exact geometric shape of the triangle, but the illusion of depth it creates to bring the life out of a one-dimensional medium. Why? Because we normally see the world in the third dimension—that’s reality—and a digital camera captures it in a one-dimensional format.
What’s fascinating about Rembrandt lighting is the lack of requirement that the shadows be hard or soft, just evident, no matter how subtle or prominent the appearance. Obviously, the harder the shadow line in Rembrandt lighting, the more dramatic a photograph can appear. The key is simply to produce both highlight and shadow areas where they coincide against each other.
It’s these third dimensional illusions that top photographers create in their photographs, usually later in their careers, subconsciously as they shoot because they’ve learned to feel and see the light in any given situation. These photographers fully understand that Rembrandt and chiaroscuro add impact, life and form to their images. It’s not a secret, it’s a photographer being cognizant of light and shadows and how they interact around their subject.
Unfortunately, with on-camera flash it’s difficult to achieve this illusion of dimensions unless you use your flash slightly off the camera lens axis. Besides avoiding hot spots created by the angle of incidence is equal to the angle of reflection, this is a typical technique used by top wedding photographers—a side-bracket-mounted flash unit. The down side of using on-camera or side-mounted flash is the lack of a modeling light to see the effect of the light on your subject until after the picture is taken, and this is when you chimp the camera’s LCD screen.
However, with studio flash, both on location or in the actual studio, a photographer can use the “modeling” light in a flash head to instantly identify where the shadows and highlights fall, thus positioning the subject until Rembrandt lighting is evident An experienced photographer who fails to see chiaroscuro or Rembrandt lighting on their subject should simply have their subject turn in or away from the light, gradually, while watching where the light strikes until the Rembrandt triangle is formed.
It’s all about the angles when it comes to lighting. Angles can determine soft or hard light in the physics of light, but angles in posing can determine the style of lighting, especially when capitalizing on the Rembrandt effect. Great aspiring photographers figure this out, either from their photographic mentor or by studying the styles and techniques of some of the greatest photographers and artists over the years. These aspiring photographers also take what they’ve learned then apply and refine it until they discover their own photographic style—eventually leaving their mark.


Trackbacks/Pingbacks