Like many photographers, the first time use of a photography product can give you doubts, but my first time use of the SUNBOUNCE Sun-Cage, left no doubts in my mind what it can do for a photographer. The SUNBOUNCE Sun-Cage is basically a portable photography studio in a bag that weighs less than 44-pounds and allows you dozens of combinations — it’s like building a mobile location studio in less than 15-minutes anywhere you travel.

This photo of Dilara was captured with her standing in the SUNBOUNCE Sun-Cage plus light from the SUNBOUNCE MINI 3-D Raindrops Silver photography reflector fabric screen.
Thanks to Nikon Ambassador Vincent Versace, as I borrowed the Sun-Cage from him so I could use it at one of my biannual Moab Glamour Photography Adventure events, and he must have liked the way we were using his SUNBOUNCE Sun-Cage, because he showed up on the last day to share his great photography wisdom and knowledge. My attendees loved the fact that a VIP showed up to demonstrate his photographic techniques.

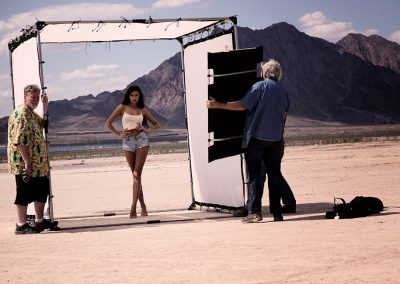
In this shoot-through method, the model is placed in the SUNBOUNCE Sun-Cage, without a background screen. A SUNBOUNCE ANGEL-HAIR (No Moiré) fabric screen is available for the SUNBOUNCE Sun-Cage to darken the background, similar to a neutral density photography lens filter.
Every photographer has their unique photographic style, but Vincent and I both agreed, based on the beauty that Moab offers when it comes to backgrounds when working with models, that the best use of the SUNBOUNCE Sun-Cage was the “shoot through” method. In the shoot through method, you use a -2/3rd stop SUNBOUNCE white diffusion fabric screen as the top, plus another -2/3rd stop SUNBOUNCE white diffusion fabric screen as the side facing the direction of the incoming light from the sun. On the opposite side you’d use the SUNBOUNCE Black/Black polyester side cover which acts as negative reflector to subtract light.

This photo was captured with Rebecca standing in the SUNBOUNCE Sun-Cage with additional light provided by the SUNBOUNCE PRO fitted with the Sparkling Sun photography reflector fabric screen.
This perfect combination of black, white, white of reflector and diffusion panels created a superb studio in less than 15-minutes to set up — and no flash units or studio strobes were required with this set-up. No need for electricity, just Mother Nature herself, and for a little pop of light and a small bump of contrast, all you have to do is use the SUNBOUNCE PRO or MINI photography reflectors with your choice of fabric screens. At our adventure we provided three SUNBOUNCE fabric screens, the 3-D Raindrops Silver, the Sparkling Sun, and the Zebra.
When I photographed Dilara, whose skin tone is a darker olive than Rebecca’s lighter skin tone, I used the SUNBOUNCE MINI with the 3-D Raindrops Silver reflector fabric screen as it provides a muted-silver touch of light. The 3-D Raindrops Silver reflector fabric gets its name from its textured fabric that sports what appears to look like actual raindrops and their three-dimensional shapes scatter light in various directions that causes the normal harshness found in flat silver reflectors to mute while still providing a punch of light and contrast. Think of it as a “soft silver” photography reflector.
In the case of the SUNBOUNCE Sparkling Sun photography reflector fabric I used to photograph Rebecca, this reflector fabric screen provides a muted mixture of gold, silver, and white on one side and on the back side a mixture of white, gold and silver. These unique formulations, only available from the SUNBOUNCE Sparkling Sun photography reflector fabric screen, provides a minus 650 Kelvin of color temperature on the front side and a minus 400 Kelvin of color temperature on the backside from the reflected light, thus, a hint of extra warmth with sunlight as your main source of reflected light.
The specially made SUNBOUNCE Sparkling Sun photography reflector fabric causes a creamy punch of warmth to the skin tone of your model. You can read more about it in my photography tip, Photography Reflectors, Sparkling Sun Beats Gold and learn why gold is gone, Sparkling Sun is in when it comes to the photography of people, especially those with middle to light skin tones.

In this photo you can see how the SUNBOUNCE -2/3 stop white diffusers for the top and left side of the SUNBOUNCE Sun-Cage plus the SUNBOUNCE PRO photography reflector fitted with the SUNBOUNCE Sparkling Sun fabric screen, illuminate Rebecca.
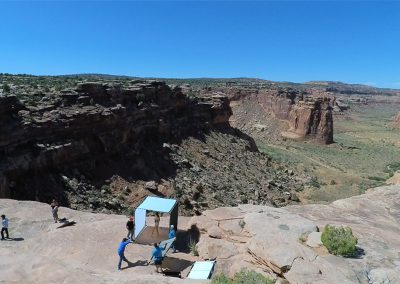
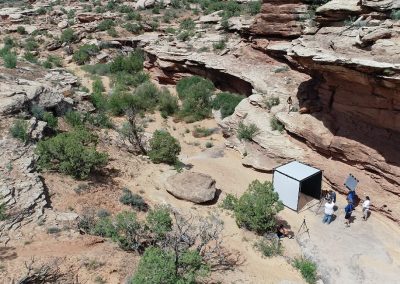
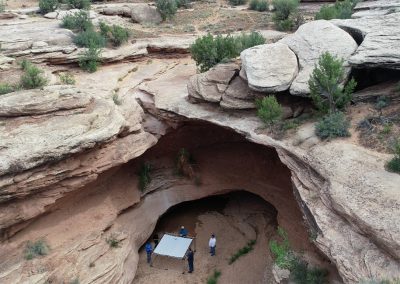
Now let’s get back to the SUNBOUNCE Sun-Cage, the portable photography studio in a bag. Did I say portable? You can use it practically anywhere. In fact, it’s so portable, that myself and a couple of my Moab photography adventure attendees and I picked it up off the ground and moved it about a hundred feet to another spot like it was nothing. Now that’s portable. But let’s start from the scratch.

Dilara is illuminated by the diffused light created by the portable SUNBOUNCE Sun-Cage diffusion studio plus the SUNBOUNCE MINI fitted with the SUNBOUNCE 3-D Raindrops Silver photography reflector fabric screen.
The Assembly and Use Experience
The SUNBOUNCE Sun-Cage is fairly easy to assemble, in fact, our first stop on the way to Moab was in Las Vegas where I do several photography workshops each year. The day after our indoor workshop, three of the attending photographers and I, after shooting at the infamous Ghost Town in Nelson, Nevada, stopped at a dry lake bed you have to pass when headed back to Las Vegas. It was windy and since we didn’t have the optional SUNBOUNCE Safety Kit, which includes rope, sand bags and tent pegs, I informed everyone that we’d all take turns holding the cage in the wind —two people, not one, for safety reasons.
Though the wind was strong at times, all worked well as we configured the cage in the shoot-through form with the top and the two opposing sides fitted with the -2/3rd stop SUNBOUNCE white diffusion fabric screens. Basically, it’s like putting your model inside a soft box. We also used the SUNBOUNCE PRO with a Sparkling Sun photography reflector screen and the SUNBOUNCE MINI with the 3-D Raindrops Silver photography reflector screen, again, the reflectors used were dependent on the model’s skin tone.
This first stop allowed me to show those three photographers, Mike, Jon, and Jack, how to assemble and use the SUNBOUNCE Sun-Cage. While Jack only attended the Las Vegas workshop, after using the Sun-Cage, he signed up for our upcoming Oct. Moab photography adventure. Jon and Mike would go on with me to Moab, and the next day after we arrived, along with my assistant Brian, it took them less than 15-minutes to assemble the SUNBOUNCE Sun-Cage. I was really proud how quick they caught on, and later I told them about my first encounter with the SUNBOUNCE Sun-Cage.

This photo was captured with Rebecca standing in the SUNBOUNCE Sun-Cage with additional light provided by the SUNBOUNCE PRO fitted with the Sparkling Sun photography reflector fabric screen.
I now share what I told them, with you, so you won’t make the same mistake with your SUNBOUNCE Sun-Cage that I did with Nikon Ambassador Vincent Versace. When Vincent first got the SUNBOUNCE Sun-Cage, we did one thing wrong. We stretched each fabric screen as tight as possible — this is something normally done for a scrim or butterfly photography light modifier. This is something you do not do with the SUNBOUNCE Sun-Cage. Though you secure each screen’s corners with the SUNBOUNCE Bungee-Snakes and the sides with scrim ties or other bungees, you let the fabric screens drop loose inside the metal frame — think of it as a fabric screen cube within a metal frame cube.
This cube within a cube concept is necessary so you don’t damage the frame, plus this “looseness” of the fabric allows you to use the SUNBOUNCE Light-Leak Seals to prevent stray light from entering the cube and that can cause a hot spot sliver of light on your subject. These SUNBOUNCE Light-Leak Seals are easily attached to the sewn-in Velcro sides of each fabric screen — quick tip, when you put the fabric screens on your frame, ensure that the Velcro is facing the inside of the SUNBOUNCE Sun-Cage in order to secure the seals.
As you can tell from the photos, I’m thankful Nikon Ambassador Vincent Versace allowed me to use his SUNBOUNCE Sun-Cage on my recent trip to Las Vegas and the Moab and I have no doubts as a photographer that your first time use of the SUNBOUNCE Sun-Cage will provide you with great photographic results. If you’re looking for that on-location, portable studio, the SUNBOUNCE Sun-Cage is your 44-pound solution that comes with dozens of combinations that allows you to build your own studio on location per your specifications.
Look for upcoming videos on how I, and Nikon Ambassador Vincent Versace use the SUNBOUNCE Sun-Cage in various fabric screen combinations, plus with various light sources and photography reflectors. The photographic possibilities are unlimited.

