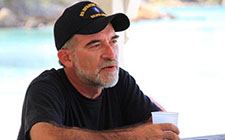
Keeping It Simple. As photographers, there are times where we want to scout a new photography location, but still want to grab some shots, so we travel light, another benefit of the SUNBOUNCE photography reflectors. They’re lightweight, durable, and pack small when not in use and also help “tone-down” a professional photo shoot so you don’t get inundated with gawkers or annoying onlookers. There are times where it’s better not to look like a full production crew with C-stands and sandbags, especially on public beaches filled with tourists.
While doing a shoot up in Maui, with professional photographer Todd Mizomi, or goal was to carry a light load as possible as for most of our shoots over a three-day period, we had no assistant, it was just Todd and I, and neither one of us are as young as we once were in our early days of photography. On one day, I also took time out to photographer a model I had worked with many times in the past ten years, but this time I’d be photographing her, her new baby, and her husband — and we had our model for the rest of the trip, Rebecca, handle the SUNBOUNCE PRO fitted with a ZEBRA fabric screen on that day. The SUNBOUNCE PRO was our sole main light modifier that reflected the setting sun back on to the family for their photo.
Not to mention, on one of our days, we’d be heading down to a waterfall down past Hana, and it’s a two-mile hike on the Pipiwai Trail to the Waimoku Falls, one of Maui’s largest waterfalls. On a warm humid day, the last thing you want is heavy gear for a four-mile round trip hike through the rainforest jungle and bamboo forests, so on that day all we took was a SUNBOUNCE MINI photography reflector fitted with a SPARKLING SUN fabric screen.
Along the route, we’d stop to take photos and thankfully the SUNBOUCE reflector is easily assembled in less than two minutes, then disassembled even quicker, as we continued our hike to the water fall. Even though it was the wrong time of the day by the time we got to the waterfall, I wasn’t too worried as it was partly overcast with a few “sun breaks” along the way. As with all reflectors, not even a SUNBOUCE can amplify light; however, photography reflectors do redirect light to where you need it and in this case, we needed it on the model.
Along the route, we’d stop to take photos and thankfully the SUNBOUCE reflector is easily assembled in less than two minutes, then disassembled even quicker, as we continued our hike to the water fall. Even though it was the wrong time of the day by the time we got to the waterfall, I wasn’t too worried as it was partly overcast with a few “sun breaks” along the way. As with all reflectors, not even a SUNBOUCE can amplify light; however, photography reflectors do redirect light to where you need it and in this case, we needed it on the model.

This photo of Rebecca was captured using a SUNBOUNCE MINI photography reflector with a SPARKLING SUN fabric screen.
Now shooting a model outdoors, especially with water and sky, can provide difficulties, for example; if you expose for the model’s skin-tone, with no additional fill-light on her, the sky, and quite possibly the waterfall will washout, or be nonexistent. If you expose for the sky, or scene, the model will photograph too dark. This leads you to one of three choices, other than the ones just mentioned, if you want to keep the scene and model prominent in your photos, you must provide fill-light to your subject with either a flash, a reflector, or both. In this case we had no flash, just a reflector, but we weren’t worried — it’s a big waterfall almost 400-feet tall — sky was not an issue.
As mentioned before, the day was partly overcast, so the key was to redirect the sunlight coming through the sun breaks with the photography reflector and to place our model in an open shade area. The other trick is to try and eliminate or make the sky behind your subject more interesting, thus reducing any blown-out highlights. This is easily done when you position the model where you can see something else besides the sky, or just partial sky. In our case, we had plenty of foliage around us, so dark foliage, with the principal being that any dark background when overexposed, since you expose for the model’s lighter skin, is not noticeable to someone viewing the final result.
The other trick, since unlike flash a reflector doesn’t require a sync-speed, is that you can increase your camera shutter-speed, which allows you to “open up” your lens aperture. Lower apertures mean more “bokeh” or blurred out backgrounds. This keeps the focus on the model and overexposed, blurred, dark backgrounds become pleasant “unknowns” in the final image. In the case of the waterfall, we wanted a little of both. I cannot stress that SUNBOUNCE photography reflectors have that “I don’t have to worry about camera shutter sync-speeds” built-in performance.
If you have no dark background, then you might have to settle for what photo editors call “over-lit” backgrounds. While trends change in photography on a regular basis, I’m not a fan of over-lit backgrounds unless requested by an editor or client. In fact, in the old film days, we called these types of backgrounds overexposed. The few times I’ll shoot for an over-lit appearance is when I’m trying to add some mood to the image, but I’d rather do that with a low, or wide aperture and the bokeh the lens naturally creates. Shooting for more bokeh also reduces your need for a ton of production gear because other than the camera, you just need a great lens (glass) with a great reflector like the BIG, PRO, MINI, MICRO-MINI SUNBOUNCERS.


